It's kind of like walking straight into an electric fence, or getting shot with a stun gun. That's how one biologist describes the experience of getting zapped by an electric eel.
"You wouldn't voluntarily do it over and over again," said Kenneth Catania, a professor of biological sciences at Vanderbilt University in Nashville, Tennessee, and author of a new study about the electric eels' shocking behavior.
Catania has been zapped a few times since he began studying the electric eel (Electrophorus electricus), a fish that's indigenous to the murky waters of the Amazon. Endowed with three electricity-producing organs, E. electricus can send a pulse, or volley, of high-voltage electricity through the water toward prey items. These shocks aren't meant to kill the prey, just demobilize it so the eel can more easily consume its victims, Catania told Live Science. [Video: Watch an Electric Eel Curl Around Its Prey]
To envision how the eel uses its electric charge, try picturing the critter's long, thin body as a skinny magnet. Like a magnet, the eel has two ends, or poles. When the animal sends out an electric pulse, most of the charge comes from its head, which Catania calls the "positive pole." The eel's tail serves as the "negative pole," sending out a much weaker electric pulse than the head, Catania said.
Most of the time, E. electricus just needs the charge from its head to demobilize prey. However, the tail end of the eel is actually quite important, Catania's new study shows. By bringing its tail around toward its head, an electric eel can double the strength of the electric pulse it sends out into the water, allowing it to demobilize larger prey items, the study found.
To measure the energy output of a curling eel, Catania rigged up a sort of eel chew toy by attaching a dead fish to a piece of wire. The fish was fitted with electrodes that could measure the voltage produced by the eel. Then, Catania stuck the chew toy in the tank with the eel and wiggled the toy around, simulating struggling prey. Sure enough, the eels tended to wrap themselves around the fish, and when they did so, they delivered at least twice their usual zap of electricity, Catania found.
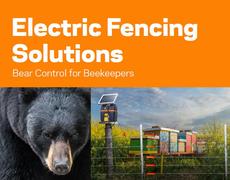
The lives of locals from many villages are at risk over the malfunction of an electric fence set up from Minneri-Oya to Pamburana.
These locals say that this situation has resulted in wild elephants breaking through the fence, and storming into villages.
The construction of this electric fence commenced over a year ago in order to prevent wild elephants from the Somawathi National Reserve from storming into the villages.
Although the construction is almost complete, it has not been made public as yet. This is the fate that had befallen on the electric fence even before it is put into operation. (Please see video)
Wild elephants from the Somawathi Forest have damaged this electric fence at several locations. The 10 kilometre long stretch of the fence from Minneri Oya to Pamburana is yet to benefit the locals in the areas.
Forest Users’ Committee chairman says electric fences have not worked due to the carelessness of local residents
Sep 23, 2015- Electric fencing installed to prevent wild animals’ terror has not been effective at Thori in the district. As a result, terror of wild tuskers, wild boars and deer, among other animals, continues in the area. Wild animals have been entering human settlements and are destroying the properties and crops though electric fencing was constructed along forest areas connected with the Chitwan National Park (CNP). The fence was constructed from Ward No 9 of Ichhanagar to Ward No 1 of Chautara area. The eight kilometre long fence is run using solar power. Tarai Arc Landscape Programme had provided Rs 570,000 to Nirmal Thori Forest Users’ Committee to build the fence. The programme had also installed a machine to flow current on the wires. Local Prem Lama said the current used to be flowed on the fence from 8pm to 5am at night. “For a few days, the fenced worked well. Thereafter, wild animals have been entering the settlements,” he said, adding that locals are terrified go near forest areas. Stating that wild boars and deer destroyed their crops, Lama said wild tuskers are also destroying their houses as well as properties. Locals said wild tuskers enter the settlement avoiding the fences. Users’ Committee Chairman Hari Prasad Khanal said the fences have not worked properly due to the carelessness of locals. “Even wild animals are destroying the fenced area,” Khanal said, adding that they have submitted a proposal to the CNP demanding refinement and proper management of the electric fence project.
Electric Fence and Hunting. With various hunting seasons getting ready to kick off, I was reminded recently of a tip that has helped me out of many jams in the field.
electric fences When hunting on private property, especially if you’re around a lot of farmers, you’ll often run into blocking your path. For some, this can be a daunting challenge, but it really shouldn’t be.
Simply use the butt of your gun to push the fence down toward the ground and then step over it to avoid getting shocked. The wood on your gun stock won’t conduct electricity — obviously, if you have a metal stock, don’t try this unless you have a rubber recoil pad on it — and the fence will return to normal once you take the stock off. I’ve done this countless times while hunting for snow geese near the border of Eastern Kansas and Nebraska, and it’s a great technique to easily clear an otherwise bothersome obstacle. It can also work on loose barbed wire fences.
For tighter barbed wire fences, first place your gun on the other side of the fence, then either press down on the fence with your hands and go over or have a buddy use their foot to push down on the bottom wires and their hands to pull up on the top wire and go through the hole in the middle.
The S10 Solar Energizer is the newest electric fence charger of the Gallagher Solar Energizer Line-up. This compact, robust solar energizer that comes with a rechargeable battery and solar panel is a convenient and cost-effective alternative to battery-powered energizers.
The S10 powers up to 3 miles and boasts several customer inspired improvements that make it ideal for strip grazing, garden protection, livestock and pet containment.
"But it's the S10's ease of use that really sets it apart. It's incredibly simple to set up and operate. You hook it up to the fence and ground rod, turn it on and walk away."
Once activated, the S10 will continue to operate for up to three weeks without sun. An easily visible LED Pulse Indicator shows the Energizer is working and has enough charge. A red light flashes if the battery is low. The waterproof and drop resistant casing is made to last extreme conditions and the S10 Energizer is equipped with in-built lightning protection.
"And it's very easy to move the S10 from one fence to another. It's only has one control switch, so you don't have to be expert in electric fencing to operate it."
The S10 can be used in both portable and permanent electric fencing applications. The optional portable post mount allows attachment to temporary fence posts. For longer term electric fencing scenarios such as protecting silage bales, trees and riparian areas etc., the S10 can be attached to a wooden post or sit on top of a steel post. The steel post mount allows for 360 degree placement so that the solar panel can be easily positioned south towards the sun, regardless of which way the post is facing.
Consumers looking to get the most out of solar energy can rely on Gallagher's S10 Solar Energizer to provide dependable, pasture, livestock and pet protection in all weather conditions with many animal types.
We think its worth the extra money to buy a lightning arrestor or diverter for a few bucks... check out this fence charger that got blown up by a strike. www.valleyfarmsupply.com
Whether you are looking for a charger to energize your permanent electric fence or you need something small scale for a netting or temporary set of lines, Gallagher fence chargers are the solution for you. We carry a AC (110V) chargers, battery-powered chargers, and solar-ready chargers. We've even got some fully integrated solar energizers for your convenience.
QUESTIONS? CLICK TO READ OUR GUIDE: WHICH FENCE CHARGER DO I NEED? If you are looking for the top of the line, check out our iSeries lines of chargers that come loaded with options like fence zoning, voltage & cut alarms, sms alerts, and more.
Electric fence charger danger? what kind of electric fence was this?
Two men died and five other people, including two children, from two families were injured after they were electrocuted by an electrified fence set up by a local resident to keep out deer and other wild animals from hydrangeas in Nishi-Izu, Shizuoka Prefecture, on Sunday.
According to police, the group consisted of two men aged 42 and 47, three women and two children aged 8 and 3. Fuji TV reported that the incident occurred at around 4:40 p.m.
An electrified fence had been put up along a riverbank. Police said one of the men suffered an electric shock when he entered the river, while the others were electrocuted as they tried to assist him.
All seven were taken to hospital where the two men were pronounced dead late Sunday.
Locals who live near the river have said that deer have been causing quite a bit of damage, and therefore it was decided that an electrified fence would be erected in order to ward the animals off, Fuji reported.
However, police later found that a part of the fence had been cut and that one of the cables supplying power to the fence was dangling in the river, which is likely to have caused the seven people to have gotten electric shocks.
High tensile electric fencing is a sturdy, highly conductive style of perimeter fence which carries a strong enough charge to effectively contain sheep and deter predators when well maintained. Typically galvanized steel, each run of high tensile electric fencing will have a tensioner (one style pictured at left) for each strand as a means of easily maintaining this fence (tightening it periodically as the fence naturally sags over time). Generally this style of fence is installed for sheep with either 5 or 7 strands depending upon the installation environment, your budget and the threat of predators. The advantage of installing high tensile fencing as a perimeter fence around a large pasture is that it allows shepherds to easily strip their pasture into smaller paddocks to use for effective rotational grazing, increasing the health of their pasture. Potential Drawbacks to Using High Tensile Electric Fencing
Overall I'm a huge proponent of this style of fencing and if I was investing in sheep for the long-haul I would certainly choose this style as one of the core elements of my perimeter fencing. While this style of fencing can be challenging to work with and time-consuming to set-up and build initially, it's easy to maintain and lasts a long time. Growing up, we installed this for our cattle and sheep on my family farm and having Gallagher high tensile fencing surrounding our large pastures allowed us to easily use plastic mesh temporary fencing and polywire strip fencing (both of these are covered in-depth lower on this page) to sub-divide our pastures and maintain the health of our grasslands through proper rotational grazing. Installation certainly won't happen overnight ... expect to invest some time to set up this style of fencing. It's worth doing it right to make it last.
Cost of a High Tensile Electric Fence for Sheep (1 Acre Paddock) High Tensile Electric Fencing with Insulator Since there are so many more products required to assemble a high tensile electric fence relative to the alternatives here, we used an online fence planner to build a shopping list of products. Other sites like Gallagher have similar tools available and if you have questions we recommend that you contact your local rep or send us an email and we'll be happy to point you in the right direction. This is what our shopping list looked like for a 1 acre, 5 strand high tensile perimeter fence with all the bells and whistles ... we hope this offers a quick ballpark glimpse of what a high tensile electric fence may cost relative to some of these other styles, but please remember that this is a fence style which is designed to surround large sections of grassland so the bigger the area you plan to fence, the lower your cost per foot will be.
Please keep in mind that the relative cost of fencing more of your pasture with high tensile electric fencing will be lower as this style of fencing is designed to be long-lasting and to secure extended stretches of field. Today's high tensile electric fencing products for sheep are designed to last 25+ years, making this an excellent investment if you plan to raise sheep for the long haul.
Our recommendation if you're just starting out is to go with a less expensive (and less permanent option), and when you're sure that you plan to maintain a flock for a decade or more, that's a great time to invest in a permanent, efficient high-tensile perimeter fence from Gallagher.