February 29, 2016

Top 7 list of electric fence testers and testing methods


  1. Digital fault finders for electric fence.

These are great tools to have on any size farm or ranch that relies of electric fence to keep animals or livestock safe a secure. There are 2 kinds you should consider if this is what you need.

First is the Gallagher Smartfix. This is a great product which costs around $100. It comes with a ground probe which you insert into the soil, and acts as the ground. The Gallagher display is then placed against the electric fence wire. The digital readout will give you electric fence voltage and also show amperage, that the fence charger is producing, if there is power loss on the fence. Arrows will appear in the direction of any faults where loads are detected. You should head in the direction of the arrow until you find and correct the electric fence short. It may be a broken insulator, arcing onto the fence post, or vegetation on the fence wire.

The second fault finder we recommend is the Speedrite Fault Finder. This unit costs about $130. This unit is made by Trutest and may also be called a fence compass. The Fence Compass is a Stafix brand and green in color. The Speedrite Faultfinder is red and is the same device. The Speedrite product number is ST100, An advantage with this electric fence tester is that you hold the unit in your hand and you act as the ground. This lets you, quickly and easily walk the fence line, to correct any problems and keep you fence at peak performance. A down fall is that you cannot check current out of you fence controller with the electric fence disconnected like you can with the Gallagher Smartfix.

  1. Remote Control/Digital Fault finders.

Electric Fence remotes are great tools to have on any size farm or ranch that relies of electric fence to keep animals or livestock safe a secure. Mostly you will have these if you purchase a smart energizer that the remote works with. There are 2 kinds you should consider if this is what you need.

Gallagher offers the I Series remote/ fault finder that accompanies the Gallagher I Series of energizers. These are smart fence energizers that offer very cool ways to show if there is any problem in an electric fence. Remotes allow you to turn off the energizer while you make repairs or move animals to different pastures. The I series chargers include the M1800i and M2800i.

The Speedrite Remote Fault Finder, product number ST102, is similar and also acts as a remote control for Speedrite RS Fence Chargers. See them here.

  1. Digital Voltmeters.

Also known as DVM’s, Gallagher Digital voltmeters show the voltage of your electric fence on a digital readout display. Most will show in kilovolts or KV’s. A fence with 7.2 Kv’s is producing 7200 volts on the fence at that place in the electric fence. Most cattle and livestock fences should have at least 5000 volts energizing the fence to keep the animals in our predators out. Gallagher offers a very good DVM and can be found here for about $50. Do not use a voltmeter made for household current or any other electric current measuring device. Electric fence voltmeters are made to handle the high voltage and pulse of modern electric fence chargers.

  1. 5 light testers or neon testers.

5 light electric fence testers are a simple and affordable way to determine the voltage of the fence. You stick the ground probe in the soil and the head to the fence. A row of lights with illuminate showing the fence voltage. The tester will blink with the pulse of the fence charger. It is better than a guess and can be a good tool for the farm.

  1. Single light testers.

Single light fence testers are the most basic way to test your fence for current. These are inexpensive and handle to have to quickly check if the fence is on. You will not be able to check voltage or amperage. We offer these free when you purchase a fence chargers from Valley Farm Supply. We include them with most energizer orders and area nice gift to people new to electric fencing.

  1. Blade of grass electric fence testing.

Testing an electric fence with a blade of grass is very low tech. It will let you know if its working but nothing else. Pluck a long blade of grass and put the tip on the fence wire while holding the other end. Slowly push the blade closer to the wire until you feel a slight pulse of current. That’s about it. Every farm kid in the country has done it and it’s a good way to know if the fence is on and you will be shocked.

  1. GIAG, also known as, Grab it and Growl.

We do not recommend this method for testing your electric fence!! It is simple and easy but can really hurt you… This is how it works. Grab your electric fence, the current shocks you hard and it hurts bad. You yell, OUCH!, and jump back from the fence. Yep, the fence is working! You don’t know how strong it is but you got a nice shock.

Visit our website here and order the correct fence tester for your farm. Be thankful you are living and have a good day.

February 27, 2016

How to Install An Electric Fence Charger


The Benefits of An Electric Fence

An electric fence helps you control animals on your property by allowing a safe amount of electric shock to be administered when animals come into contact with your fence. While an electrical fence DIY project might sound daunting, it is actually easier than you might imagine to install and electric fence on your property, including posts, wiring, and your electric fence charger. While other barrier fences can injure and scrape animals and livestock, an electric fence helps train animals to respect the limits of your property, as well as keep unwanted visitors at bay. We’ll walk you through the basics of what you’ll need to create a safe, effective electric fence with a charger that keeps your system running.

electric fence and grass farming

What You Need to Get Started

 Installing your electric fence charger shouldn’t be a headache. Starting with the right supplies will be the biggest hurdle you face in installing your charger—the actual procedure is quite straightforward. As far as the tools and equipment required, you’ll definitely need a screwdriver, as well as a charger, and you may need gauge wire, fencing pliers, a clamp, a wrench, a post pounder, needle nose pliers, and a grounding rod. Gloves should also be worn throughout the procedure for an extra layer of protection. Depending on the type of charger you plan on using, you may need some additional supplies that will be determined by how you mount your fence charger. As far as supplies go, we recommend shopping at an electrical supply site where you can stock up on your necessities in one go, rather than running from store to store to make sure you have everything you need for your project.

Grounding Your Fence System

 To get started, we’re assuming that you already have a fence in place and that you’ve selected a post to mount your charger on. It is crucial that you have a grounding rod system installed as a part of your fencing system. These grounding rods should be at least six feet long, and optimal grounding rod placement for proper safety protocol requires that the rod be within twenty feet of your fence controller. Your charger must be grounded, which will reduce the hazard of electrical shock if your fence malfunctions by providing a low-resistance path for the electrical current. If you are installing an electric fence in an area where there is asphalt, extremely dry, or extremely cold/frozen ground, you may need to take extra steps to insure that your system can be properly grounded.

Installing your Electric Fence Charger

It is key that you use a non-corrosive, metal electrical wiring made from steel or aluminum wire, with an appropriate gauge for your fencing project. Wiring is available specifically for electric fences and is designed to accommodate the proper voltage for your fence—the voltage of typical electrical wiring will be too low for this kind of a heavy-duty project. Your electric fence charger should have color-coded fence and ground terminals to help you determine one from the other. Attach a ground rod clamp and connect it with the ground rod wire. Connect the lead out wire of your electric fence charger to the fence terminal. This will allow your system to maintain a charge that is powerful enough to be effective, while the grounding system will ensure that it is safe and represents a minimal hazard.

electric fence working on the farm

Protecting your Electric Fence System

Eventually, it may be a good idea to have a bucket or some kind of covering for your post-mounted fence charger, in order to protect it from the elements. It is also possible to create your own wooden enclosure for your charger. To be on the safe side, cut a vent into your bucket or enclosure, in the case of extreme temperatures. Chargers are designed to withstand typical outdoor weather conditions but by protecting it, you’ll be able to increase it’s lifespan. Additional supplies, such as a volt meter, will help you measure the charge of your fence and make sure that your electric fence charger is doing its job.

February 26, 2016

HOW DOES ELECTRIC POWER FENCING WORK?

A electric power fence is a psychological barrier that keeps farm animals in and wild animals and vermin out – even over long distances. A pulsed electric current is sent along the fence wire, about one pulse per second, from an energizer which is earthed. When the animal touches the fence it completes the circuit between the fence and the ground and receives a short, sharp but safe shock. The shock is sufficiently memorable that the animal never forgets. If the ground is very dry, the fence may require an earth return wire. A power fence is a psychological barrier so doesn’t need great physical strength. However, it must be well designed and constructed to absorb some pressure from animals, snow and wind. The energizer must have enough power for the length of fence and for the animals being controlled.

February 19, 2016

Wildlife Refuge seeks interest in cattle grazing


Sherburne National Wildlife Refuge, Sherburne County, MN is considering interested cattle producers (other species will be considered) to graze on two designated areas on the Refuge.  One grazing cell is approximately 2,266 acres and the second is 4,670 acres.  Both grazing cells consist of mainly prairie openings with woodland, and wetland habitat types.  The refuge is seeking producers with herds consisting of roughly 120-150 animals or 100-125 cow/calf pairs.  The grazing period will be from May 1st to September 1st.


The permittee will be responsible for maintaining permanent boundary fence and installing and moving temporary fence.  Under this arrangement producers may be offered to graze up to a period of five years while within compliance of the grazing contract.
The purpose of the grazing program is to utilize this powerful habitat management tool as a biological control method to promote and enhance native grass and forb diversity in the prairies, reduce invasive species in the oak savanna and woodland habitats, and to aid in the control of reed canary and cattail in the wetlands.
Individuals will be selected based on receipt of a sealed high bid.  All bids must be received no later than 3:30 pm Tuesday, February 16.


Anyone interested in this program should please contact Greg Dehmer, Assistant Refuge Manager at 763-389-3323 to obtain a grazing bid package which will provide detailed information of the program, bidding requirements and expectations of the grazing permittee.


Sherburne Refuge is managed by the U.S. Fish & Wildlife Service, and is located near the cities of Princeton, Zimmerman, and St. Cloud, in central Minnesota.  Website:  http://www.fws.gov/refuge/sherburne/.
The mission of the U.S. Fish & Wildlife Service is working with others to conserve, protect and enhance fish, wildlife, plants and their habitats for the continuing benefit of the American people. USFWS is both a leader and trusted partner in fish and wildlife conservation, known for scientific excellence, stewardship of lands and natural resources, dedicated professionals and commitment to public service.  For more information on USFWSvisit http://www.fws.gov.

By

February 19, 2016

Cut your costs this spring by switching to on-off grazing

As a nation, we are fascinated by the weather, particularly rainfall. Personally, I have an interest in measuring how much of it falls every 24 hours and as I was writing this piece, my rain gauge was telling me that 72mm had fallen in the first 10 days of February where I live close to Limerick city.

However, my colleagues in Killarney were able to tell me that down there, 130mm had fallen over the same period.

Every dairy farmer out there knows that it is going to be a tough spring as regards milk price. March is traditionally the lowest milk price month of the year as solids are at their lowest levels, particularly milk protein percentage.

Ideally cows will be put out to grass in spring.

The spring is the most expensive time of the year on dairy farms and every effort needs to be made to keep costs under control.

Ideally, this means getting cows out to grass and replacing expensive silage with cheap grass.

This is easier said than done, but the technology is tried and tested and it works. Increasing the number of days at grass should be an objective for every dairy farmer. This is particularly so in the spring. So, can we take the cows natural grazing cycle and turn it to our own advantage?

When cows are out for 24 hours, they only graze for about nine or 10 hours. The rest of the time they are either loafing around, lying down and chewing the cud or just enjoying the day so cows don't have to be out for 24 hours to be fully fed.

However, if you want to let them out and maximise their grass intake, you must do it at two specific times in the day.

These two times are after both milkings. The cow has a natural inclination to graze aggressively after each milking. This period lasts for about three hours.

It is up to you, the farmer, to exploit this 'window'. To get the cow ready for the first time for on/off grazing, she needs to be out of silage by 5am in the morning if they are going to grass by 8am.

If cows are going to grass at 8am, by 11am they will have grazed for 96pc of the allocated time. These cows are not hanging about. Once they go out, their only focus is on grazing grass. In fact, these cows are so focused on grazing, they will increase their bite rate per minute from 26 grams of grass to 37.6 grams of grass - a 30pc increase in biting rate. That's not the end of the story.

The amount of grass they take in each bite also increases. Again the figure is 30pc. All the while the cow is compensating for her reduced access to pasture.

So, if you are offering 8kgs of grass dry matter in a three-hour allocation, she will have 90pc of that removed in three hours. At the end of the period, the cow goes back to the cubicle shed, only to come out again for another three hours. after evening milking.

Silage

Should you alter the time you milk your cows in the evening? Yes is the answer. Ideally, the evening milking would be between 3.30 and 4.30pm.

Then the latest the cows are back into the house for the night is 7.30pm. Should the cows have access to silage at night? The answer is no. Silage is a bulky feed. It produces gut fill and this will depress the appetite for the cow when she goes to grass the following morning at 8am.

Emer Kennedy in Teagasc, Moorepark has carried out experiments over two springs in Moorepark to validate this on/off grazing technology. It works. Cows were also fed 3kgs of concentrates while on the 31-day trial period.

Minimising group damage is one of the major benefits of on/off grazing.

Poaching/treading results in reduced grass growth as leaf is buried, plants are crushed and one also has a reduction in shoot and plant growth. In a bad situation, this can be in the order of 50pc.

John Donworth

John Donworth is Teagasc Regional Manager for Kerry/Limerick

Indo Farming

February 19, 2016

Check out our new logo!

Valley Farm Supply. Home to electric fence supplies

This is our new logo for valley farm supply. We sell electric fence chargers and energizers from many different makers such as gallagher, speedrite, patriot, parmak, cyclops, stafix, zareba, red snapper, and many more.

please visit our website at www.valleyfarmsupply.comfor deals on electric fence for cattle and livestock farms and ranches.

February 16, 2016

Free animal coloring book for your children

If your family loves animals, Heres a link to a kids coloring book for all kinds of animals. Please share with your friends.

February 16, 2016

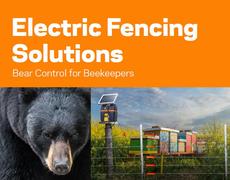
How to build a bear-proof beehive with electric fence | Gallagher Electric Fencing


I live in bear country. Every year I have visitors checking out my chicken coop, bee hives, and food forest. Yes, they take a peek through my living room window not even blinking an eye when my three dogs bark at them. Bears are, next to coyotes, mountain lions, and eagles, the main predators on my homestead.

So, when I decided to get bees, I did a ton of research on the best way to protect my bees. There was not one set-up I really liked, so I took a bunch of ideas and put together my own seasonal bear-proof fencing; you might call it a fortress, but so far, it is working.

hive enclosure _ Sustainable Homesteading

How does an electric fence work?

When I started reading up on my bear fence I felt like I was back in school. Positive and negative charge, circuit completion, grounding… let me see if I can give you a basic idea: An electric fence uses electric shocks to deter, in this case, the bear from getting into my bee hives. It is set up to create a circuit that, only if completed, will shock the animal.

An electric fence circuit is composed of different parts: The fence charger with a negative and a positive outlet, the positive wire, and the negative or grounding wire/rod/fencing.

In my setup, the energizer fence terminal (positive outlet) is connected to the insulated fence wires (hot). The energizer earth terminal (negative outlet) is connected to 1. The galvanized metal stakes (grounding rods) driven into the ground, the welded wire fencing put up behind the fence wires, the welded wire fencing put on the ground surrounding the fence, and the grounding (negative) fence wire put up in between the positive wires.

The bear has to be in contact with both negative and positive charge at the same time to get shocked. That is called ‘circuit completion.’ That is why for example, a bird sitting on the wire will not receive a shock. When putting up your fencing you really want to make sure you have a solid grounding system (grounding rods and/or welded wire on the ground, etc.) to reach full protection.

What to Consider before you start digging?

Location
When I choose the location for my hives I took several questions into consideration:
•Is this a snow loaded area during the long winter which would make it hard to access?
•Where does the sun hit the area, especially during the winter?
•Is there some wind protection? The cold is not the bees’ worst enemy; it is actually the strong winds.
•Is there sufficient amount of space to build a bigger enclosure than I think I need (in case I want to add hive boxes down the road)?
•Is the grass growing “wild and tall”? This would require for me to clear cut underneath the electric wire all the time.

Size of area fenced in
I wanted a bigger area with the option to add hive boxes during the years to come and build an earthen shelter for my bees so they would be more protected from the gust winter storms. I needed space and chose my enclosure to be 50×60 feet.

Height of fence
There are different opinions regarding the height of the enclosure. I opted for 5.5 feet.

Voltage
Long-haired animals, like the bear, require a minimum voltage of 5,000 volts to receive a shock. Pretty common for a bear fence is 12,000 volts with amperage of one or less to deliver a painful enough shock. 12 volt batteries are pretty standard and you can find them in most ranch supply stores.

bear fencing1 @Sustainable Homesteading

Materials

I am listen below the things I needed to build my fence, plan accordingly if you make a bigger or smaller fence.

Items Quantity
Wooden non-treated or cedar fence posts.I bought 8 footers since I wanted the welded wire portion of the fence to be 5 feet high, being lifted off the ground 1/2 a foot. So, two feet in the ground, 1/2 foot before the welded wire starts, and a little extra on top 18
Grounding rods 3 at least 3 feet long
Ground rod clamps which go with the grounding rods 3
Garden staples to attach the welded wire fencing to the ground 50
Gate handles 7
Electric wire: 12 to 16 gauge wire is the most common size range used in electric fencing Depending on how many rows of wire you are putting up and if you have other projects (i.e. chicken run) I would buy a big spool
Split bolt wire connectors to connect the wires to each other 2 packages
Wood Post Screw-in Ring Insulator 100
Corner lag insulators Those come in packages of 5. I bought 4 packages
Wood post gate anchor insulator 14
Bull nose strainer 5 insulated and 1 non-insulated bull nose/wire strainer
Insulated tubes to tie around posts 2 packages of 10
Crimp sleeves (size depends on the wire you buy). 0ne box of 100
Fence charger/energizer There are two types of fence chargers: 1. Mains powered, you plug them into a mains power supply let’s say at your house and 2. Battery/Solar powered: Is what I have because you can just leave them outside no matter where the hives are
12 volt deep-cycle battery 1
T-posts for corner enforcement 4
Fencing nails 1 bucket (I have them around, so I didn’t count…)
12 foot galvanized wires to attach to corner/T-posts 4
Clamps to hold heavy wire on corner posts together (size depends on wire diameter you get) 16

Tools you need

  • Posthole digger
  • Shovel
  • Level
  • Pliers
  • Wire cutters
  • Hammer
  • Patience
  • Drill (to pre-drill the holes in the posts)
  • Fence tensioner
  • Tamping tool
  • Tape measure

Where to Start?

1. Fence posts

Once you determined where you want the enclosure, you want to mark/flag the individual posts (mine are 8 feet apart) before you start digging. Note that you want the corner posts to be braced in some way or another. I chose to use heavy wire and anchor it to a T-post pounded in in the ground in an angle. To achieve the tension you want, it helps to wrap a ratchet strap around the corner post, tighten it, and then close the clamps. Tamp each post really well, so they will not move when you stretch the welded wire.

2. Putting welded wire up

You want the welded wire fencing to go on the inside of the enclosure, with the exception of the corner posts which you stretch the fencing around. Use a fence tensioner and if you have a tractor to pull the fencing tight. If not, a camelong is really helpful. Once the fence is stretched right, nail it to the wooden posts.

3. Putting electric wire up

Mark your posts at 1, 2, 3, 3.5, 4, and 5 feet, pre-drill and put the screw-in insulators in. From the ground up I place: 1. Bottom wire (hot), 2. Hot wire 3. Hot wire 4. Ground wire 5. Hot wire 6. Ground wire. You want the wire to dead end, not go up and around. The wire does not have to be super tight.

4. Building your gate
I made the gate wide enough so I could drive in with my little tractor. Think about what you want to be able to get through the gate and design it accordingly: a wheelbarrow, a lawnmower?  Also, I added 2 hot and 1 ground wire to the gate to give extra protection.

5. Installing charger and grounding rods

You want the fence charger to be inside the fence, close to the gate. I have it set up so I can reach inside and unhook the hot wire at any point. I have it sitting on the ground, some people like attaching it to a pole.

6. Grounding

Proper grounding is essential and maybe I overdid it a little, but here is what I did:
• I put three grounding rods, 10 feet apart, along the inside parameter of the fence. You want to connect those with wire and hook them up to the negative charge on your charger
• To improve the ground around the perimeter of the fence I added long pieces of the welded wire I cut in half (length-wise) laying on the ground around the outside of the fence.
• And, lastly, I added one negative wire to the whole parameter and 2 negative wires to the gate.
With all of these different methods of grounding you want to make sure that they are properly connected.

7. Testing your fence

You do want to make sure you connected everything correctly and the fence actually works.

The image below shows how electricity flows.

electric fence graphic

Image from http://www.gallagherusa.com/electric-fencing/electricfence101.aspx

Maintance

  • You need to make sure that any grass growing close to the fence is being cut on a regular basis so the hot wires are not being grounded out by sticks, vegetation, or other stuff
  • Check your battery and make sure both terminals are corrosion free
  • You might want to pour water around your grounding rods during periods of drought. This will increase the conduction.

February 08, 2016

THANK YOU FOR YOUR ORDER FROM VALLEY FARM SUPPLY!


We try very hard to make sure that each shipment we send is packed properly and the right items are sent. Simply call or email us if there are any problems and we will be happy to correct any mistakes. We love our customers and want your repeat business and word of mouth referrals to your friends and family. Here are some suggestions of ideas we would like you to consider.

STAY CONNECTED TO US:

FACEBOOK https://www.facebook.com/VALLEYFARMSUPPLY

GOOGLE + at https://www.google.com/+ValleyfarmsupplyNetVFS  

YOUTUBE at http://www.youtube.com/c/ValleyFarmSupply

POST A VIDEO OF YOUR PURCHASE: Consider creating a video about the product you purchased and post it to Youtube or Facebook.. Please mention you purchased it from WWW.VALLEYFARMSUPPLY.COM People love good reviews from customers.

HELP PROMOTE OUR FAMILY BUSINESS: Please consider linking your farm, ranch, or business web site to our web site. Add a link for WWW.VALLEYFARMSUPPLY.COM. Email us and we will link your site back. It helps people find your site and ours in a search.

PROMOTE OUR PRODUCTS AND EARN MONEY: We are looking for Affiliates. Those are people, bloggers, or web sites that put a link to our store from a web site, blog or facebook post. If someone buys from our web site through that link, you will automatically get a 5% commission from each sale for promoting our business and helping us out. Email us for details and the code to add to your site.

Thank you from your friends at Valley Farm Supply                     717-786-0368 or valleyfarmsupply@aol.com

February 06, 2016

Do Not Donate to HSUS!

TOP TEN THINGS TO KNOW ABOUT HUMANE SOCIETY OF THE UNITED STATES (HSUS)

1. HSUS spends nearly 2/3rds of its massive revenue stream on fundraising and salaries. In 2012, they generated $125 million from donations, $42 million of which went towards fundraising efforts and $44.3 million towards salaries.

2. In the 2014 election cycle, HSUS spent well over $5 million in direct contributions and independent expenditures on candidate races, former candidate pay-offs, and ballot issues. This doesn’t even include the money spent on lobbying efforts.

3. HSUS placed $26 million of reported “investments” in the Cayman Islands. This is just one of the many financial deceptions that has prompted members of our U.S. Congress to call for IRS investigations into HSUS’s 501 (c)3 tax standing.

4. In March 2014, a consumer alert was issued to Oklahomans by Attorney General Pruitt’s office in response to concerns over HSUS’s fundraising practices. Pruitt’s office then launched an investigation into HSUS fundraising appeals made in OK following a 2013 tornado. HSUS was also investigated, years earlier, by the Louisiana Attorney General following an HSUS ad campaign that raised a reported $35 million as New Orleans was recovering from Hurricane Katrina. Not all of that money made it back to Louisiana in the form of aid. Tax forms show less than $8.6 million was disbursed by HSUS that year in the form of grants, worldwide, while HSUS said they could account for $18 million that was supposedly used in Louisiana to aid recovery and help animals.

5. HSUS paid $15 million to Feld Entertainment to avoid racketeering charges in a RICO case against them. 5` Racketeering is any criminal activity that is performed to benefit an organization, a charge that is typically used against organized crime syndicates. The reason HSUS was forced into paying that settlement is that they paid a key witness in a separate trial against Feld Entertainment (Ringling Bros. and Barnum & Bailey Circus) to provide false testimony against Feld.

6. To reiterate, the last two letters in RICO stand for Corrupt OrganizationsWayne Pacelle, HSUS President and Chief Executive Officer, is a former director of radical activist group Fund for Animals and also has strong ties to Sea Shepherd Conservation Society, a group that has used violence against fishing boats. Since joining HSUS, Pacelle has distanced himself from his more radical past, often denouncing those groups.

7. Some direct quotes from the HSUS president

“I don’t love animals or think they are cute.”

– Yale Daily News

ect quotes taken from

“One generation and out. We have no problem with the extinction of domestic animals.”
– Quoted in Animal People, May 1993.

“In fact, I don’t want to see another cat or dog born.”

8. While its President may not love animals, many at HSUS do and are dedicated to preventing animal use in any capacity. This is represented in its Three R’s philosophy on its website.

The three R’s they refer to are:

REDUCING the consumption of meat and other animal-based foods;
REFINING the diet by eating products only from animals who have been raised, transported, and slaughtered in a system of humane, sustainable agriculture that does not abuse the animals; and REPLACING meat and other animal-based foods in the diet with plant-based foods.

9. HSUS has a proven track record of pursuing its meatless/animal-free agenda regardless of the consequences, harming farmers, ranchers, sportsmen, animal owners, and most importantly, consumers. In fact, on January 1st, 2015, California’s Prop. 2 and AB 1437 (“enriched” cage requirements on egg-laying hens) went into effect. This HSUS-backed legislation caused a tremendous spike in the price of eggs, the costs of which were passed on to consumers all across the country.

10. Humane Society of the United States is one of the top non-profits in the country in terms of influence in both government and public sectors. Unfortunately for HSUS, its influence doesn’t extend to its charitable ratings. Charity Navigator, one of the most respected charity evaluators, revoked HSUS’s rating on its website in 2014, replacing it with a “Donor Advisory” warning.


Please do not support HSUS!


x

x